
Some days you wake up ready to run. Other days, you wake up and just… sit.
You stare at the ceiling for a minute too long, scroll your phone a little too much, and your body feels present but your mind is somewhere else entirely.
On those slow, not-so-bright mornings, I usually end up in the kitchen. Not because I feel especially creative or energetic, but because baking gives me something gentle to do with my hands while my thoughts catch up.
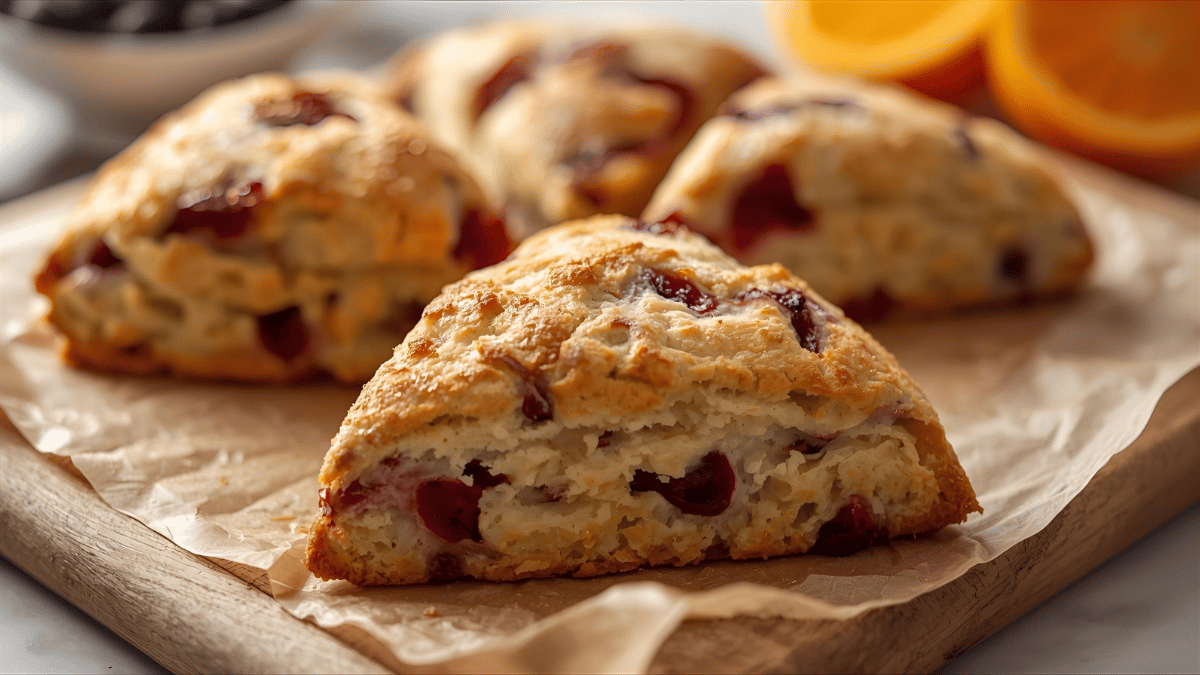
These Cranberry Orange Sourdough Scones were born on one of those days.
They’re soft, tender, a little tangy from the sourdough, filled with juicy cranberries, and finished with a light orange glaze that tastes like sunshine in dessert form. Nothing about them is fussy. You don’t need special equipment, fancy tricks, or hours of time. Just a mixing bowl, a grater, and a bit of patience.
This is the kind of recipe that doesn’t rush you. You move through it slowly, one simple step at a time, and somewhere between rubbing orange zest into sugar and pulling warm scones out of the oven, you realize your mood has shifted just a little.
Why These Scones Are Perfect for “I-Need-Comfort” Mornings
There are a lot of scone recipes out there, but this one has a very specific personality. It’s the recipe you reach for when you want:
-
Something bright, but not too sweet
The cranberries bring tart little bursts, and the orange keeps everything fresh and lively. -
A way to use your sourdough discard that isn’t bread
The discard adds moisture and a soft tang, and it feels good to turn leftovers into something special. -
A bake that feels grounding, not stressful
There’s nothing complicated about these steps. It’s very “bowl, whisk, grate, bake.” -
Bakery-level texture at home
Frozen butter + cold discard = tender, almost cake-like scones with a lightly crisp edge.
If you’ve ever had a dry, crumbly scone that felt like punishment, don’t worry — these are the opposite. Soft, moist, and melt-in-your-mouth when fresh.
A Little Backstory From the Kitchen
The first time I made these, I wasn’t trying to be creative. I was just tired.
The kind of tired where your body is fine but your brain won’t stop buzzing.
I opened the fridge, saw my jar of sourdough discard, and thought, “I really should use that.” Then I spotted a bag of cranberries I’d bought and forgotten about, and two oranges rolling around in the fruit basket, starting to look a little too soft.
That was it — no big plan, just, “Let’s see what happens if I put all of this together.”
I zested the orange straight into the sugar and rubbed it in with my fingers. Instantly, the whole kitchen smelled brighter. It’s funny how such a small step can shift the mood in the room.
I grated frozen butter into the flour. The sound of the grater, the cold butter curls tumbling into the bowl, the slow mixing — it all had this calming rhythm. No rushing, no performance, just simple, small movements.
By the time the scones were in the oven, my thoughts felt less loud.
By the time they came out, warm and golden and dotted with ruby-red cranberries, I realized I was actually a little bit hungry — and a tiny bit lighter.
Now this is the recipe I pull out on days when I need a quiet project, not a challenge.
Ingredient Breakdown (and Why Each One Matters)
You don’t need anything fancy, but each ingredient does something important for flavor, texture, and mood.
Sourdough Discard
This is your leftover starter from feedings. Using it here:
-
Adds gentle tang (not overpowering, just a soft edge)
-
Keeps the scones moist
-
Helps reduce waste (always satisfying)
Make sure it’s cold from the fridge — it helps keep everything chilled.
Fresh Cranberries
They’re the little pops of color and brightness in every bite.
You’ll halve them, so you get a good mix of tartness throughout the dough.
You can also:
-
Use frozen cranberries (don’t thaw, just add them in)
-
Use dried cranberries if fresh aren’t available (the flavor will be sweeter and less sharp)
Orange Zest + Orange Juice
The zest perfumes the whole dough.
The juice goes into both the dough and the glaze.
If you can, use fresh oranges — you’ll really taste the difference.
But if you only have bottled orange juice, you can still make the recipe.
Frozen Butter
This is the key to good scones.
Grating frozen butter instead of using soft or melted butter creates tiny pieces that stay cold until they hit the oven, then melt and create a tender, slightly layered texture.
Flour, Sugar, Baking Powder, Baking Soda, Salt
The basics:
-
Flour gives structure
-
Sugar sweetens (but not too much)
-
Baking powder and baking soda help them rise quickly
-
Salt balances sweetness and makes flavors pop
Step-by-Step: Cranberry Orange Sourdough Scones
Step 1 – Infuse the Sugar with Orange
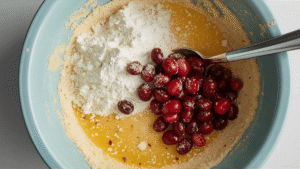
Add your granulated sugar to a large mixing bowl.
Zest one large orange right over the top.
Now, use your fingertips to rub the zest into the sugar. The grains will start to feel slightly damp and smell incredible.
This tiny step makes a big difference. Instead of zest disappearing into the dough, every bit gets evenly distributed.

Step 2 – Add the Dry Ingredients
To the orange sugar, add:
-
All-purpose flour
-
Baking powder
-
Baking soda
-
Salt
Whisk or stir to combine.
Then add your halved cranberries and toss them gently so they’re coated in the flour mixture. This helps them not sink and keeps them from clumping together.
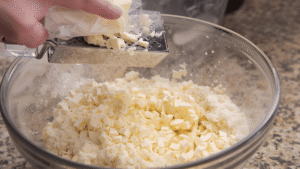
Step 3 – Grate in the Frozen Butter
Take your frozen butter and grate it on the large holes of a cheese grater directly into the bowl of dry ingredients.
Once all the butter is in, gently toss it with the flour so each little piece is coated. Don’t mash or overmix — you want those distinct bits of butter.
This is what gives you that soft, tender texture and slightly crisp edge.
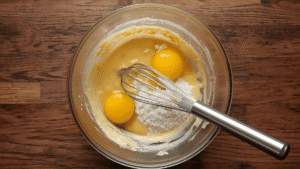
Step 4 – Mix the Wet Ingredients
In a separate bowl, whisk together:
-
Cold sourdough discard
-
A cold egg
-
Orange juice
Whisk until smooth and well combined. It should look creamy and slightly thick.
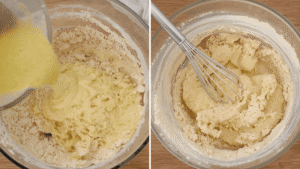
Step 5 – Bring the Dough Together
Pour the wet mixture into the dry mixture.
Use a fork, wooden spoon, or dough whisk to mix gently. It will look shaggy and a bit messy at first — that’s fine.
Once most of the flour is damp, use your hands to press the dough together a few times. You don’t want to knead like bread dough, just press and gather until it holds.
If it feels extremely dry and won’t come together, you can sprinkle in a teaspoon or two more of orange juice. Don’t overdo it — the dough should be slightly sticky but still shapeable.
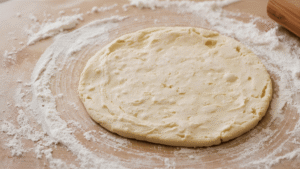
Step 6 – Shape into a Disc
Lightly flour your counter or a board.
Turn the dough out and gently pat it into a round disc about 8 inches wide. Try to keep the height fairly even throughout so all the scones bake at the same rate.
Don’t worry if the edges look rough or rustic. That’s part of the charm.
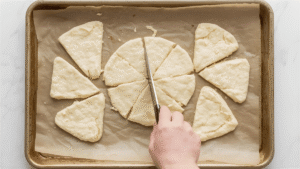
Step 7 – Cut into Wedges
Using a sharp knife or bench scraper, slice the disc into 8 equal wedges (like slicing a pizza).
Transfer each wedge to a baking sheet lined with parchment paper, leaving space between them so they can puff up and spread a bit.
If your kitchen is warm and the butter seems like it’s starting to soften, you can slide the whole tray into the fridge for 15–20 minutes before baking. Chilled dough = better texture.
Step 8 – Bake
Preheat your oven to 425°F (220°C).
Bake the scones for 12–14 minutes, or until:
-
The edges are light golden brown
-
The tops look set and slightly dry
-
You see a bit of color on the bottom
Try not to overbake — that’s when scones go from tender to dry.
Once they’re done, transfer them to a wire rack to cool slightly while you make the glaze.

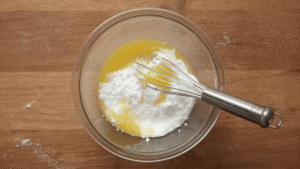
Step 9 – Make the Orange Glaze
In a small bowl, whisk together:
-
Powdered sugar
-
Orange juice (just enough to get a slow-drizzling consistency)
Start with a small splash of juice and add more drop by drop. You want it thick enough to cling but loose enough to drizzle.
Taste it. If you like things more tart, add a little more juice or even a tiny pinch of zest.
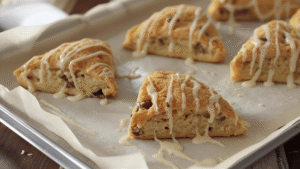
Step 10 – Glaze and Enjoy
When the scones are still slightly warm but not piping hot, drizzle the glaze over the top.
You can go all-in with a generous drizzle or just add thin lines for a more subtle finish.
Now comes the best part: sit down with a warm scone, a cup of tea or coffee, and give yourself a few quiet minutes before diving back into the rest of the day.
Tips for the Best Texture
-
Keep everything cold
Cold discard, cold egg, frozen butter — this prevents the butter from melting too early. -
Don’t overwork the dough
Scones are happiest when handled gently. Mix just until the dough comes together. -
Use fresh zest
Bottled orange flavoring won’t give the same aroma or mood. -
Check your oven
Every oven heats differently. Start watching at the 12-minute mark.
Storage & Freezing
Room temperature:
Store cooled scones in an airtight container for 2–3 days.
Fridge:
They’ll keep for up to a week. Warm them briefly in the oven or microwave before serving.
Freezer (baked):
Let scones cool completely, then freeze in a sealed container or bag for up to 3 months. Reheat in a low oven until warmed through.
Freezer (unbaked):
After cutting into wedges, freeze them on a tray until firm, then transfer to a bag or container. Bake from frozen, adding 2–3 extra minutes to the baking time.
Ingredients
Method
- In a large bowl, combine sugar and orange zest. Rub together with your fingers until fragrant.
- Add flour, baking powder, baking soda, salt, and cranberries. Stir to combine.
- Grate the frozen butter into the bowl and toss gently to coat in flour.
- In a separate bowl, whisk sourdough discard, egg, and orange juice.
- Pour the wet mixture into the dry ingredients and stir until a rough dough forms, then gently press together with your hands.
- Turn the dough onto a lightly floured surface and shape into an 8-inch round disc.
- Cut into 8 wedges and place on a parchment-lined baking sheet.
- Bake at 425°F (220°C) for 12–14 minutes, or until lightly golden. Transfer to a wire rack.
- Whisk powdered sugar with orange juice to make a glaze. Drizzle over slightly warm scones.
- Serve warm and enjoy.
Related Posts
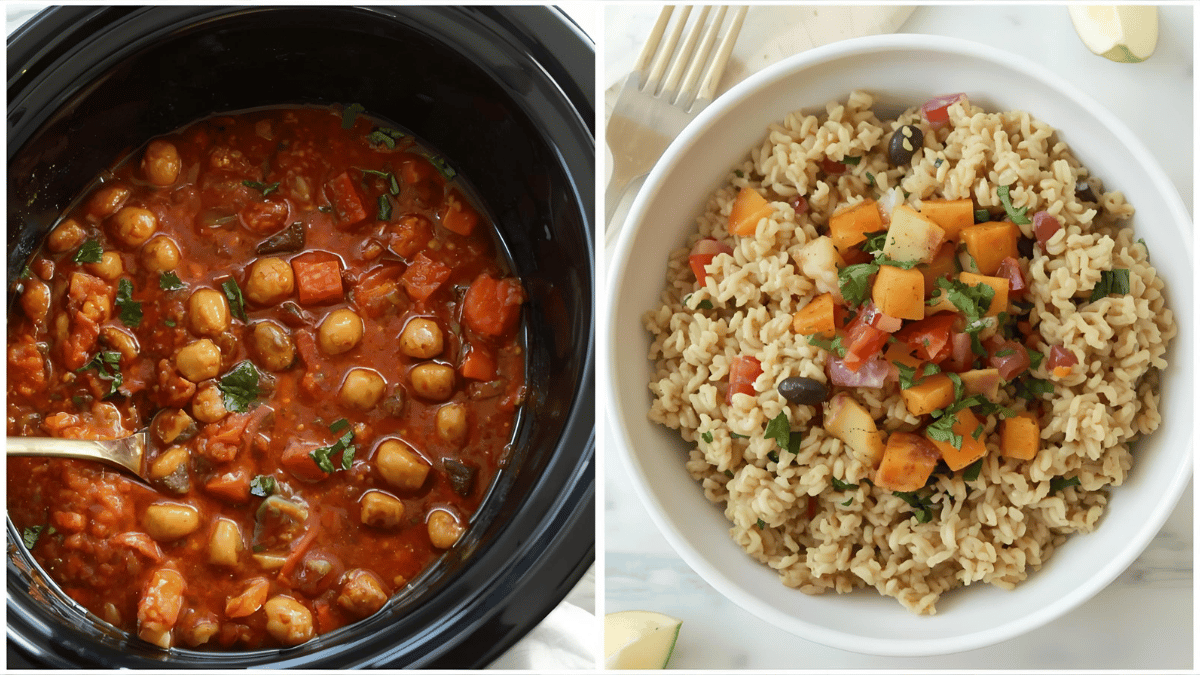
Easy Vegetarian Crockpot Recipes: A Cozy Story of Flavor, Simplicity & Self-Care
There’s something magical about coming home after a long, busy…

Soft Bedtime Meals: Gentle, Warm, and Comforting Recipes for Peaceful Nights
Night has a way of softening the edges of everything.…
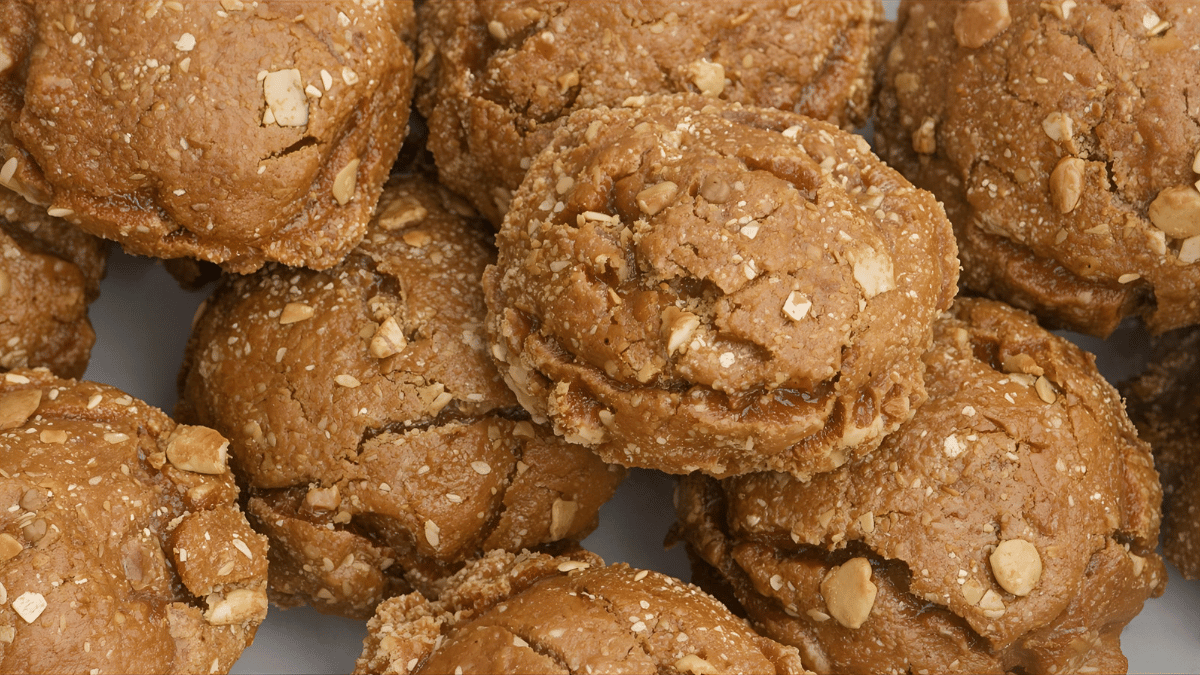
Gingerbread Truffles for Cozy Winter Evenings
A gentle, no-bake dessert for calm moods, quiet nights, and…