
There are some recipes that don’t just fill your stomach — they fill your heart. For me, rice balls are one of those simple, humble foods that remind me of family, warmth, and the joy of homemade comfort.
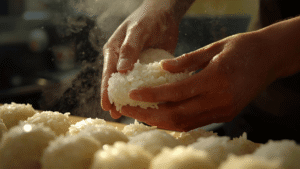
I still remember the first time I made rice balls. It was a quiet Sunday afternoon, the kind that makes you want to stay in pajamas and cook something cozy. I had leftover rice sitting on the counter and no plan for lunch. I didn’t want anything fancy — just something that felt satisfying. Then it hit me — why not turn that plain rice into something fun and flavorful?
That’s how my love for rice balls began.
A Simple Tradition Turned Favorite Snack
If you’ve ever been to Japan, you’ve probably seen onigiri, those perfectly shaped rice balls wrapped in seaweed. They’re sold everywhere — from convenience stores to lunch boxes — and they’re loved for their simplicity.
But you don’t have to travel to Tokyo to enjoy them. With just a few ingredients, you can make delicious rice balls right in your own kitchen.
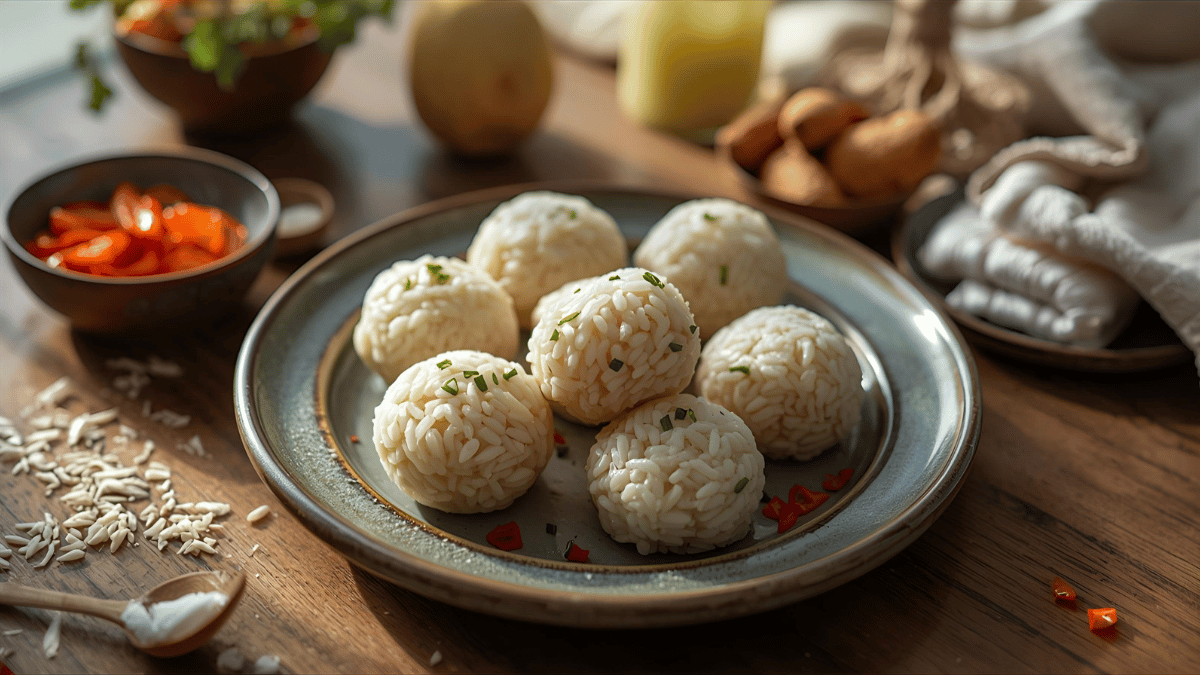
What I love most is how versatile they are. You can make them plain with just a pinch of salt, or fill them with your favorite savory surprise — tuna and mayo, spicy chicken, or even melty cheese. They’re soft on the outside, flavorful in the center, and just the right size for snacking or packing in a lunchbox.
How I Make My Easy Rice Balls
Making rice balls at home is easy, even if you’ve never done it before. Here’s how I make mine, step by step.
Ingredients
You’ll need:
-
2 cups cooked short-grain rice (Japanese or sushi rice works best)
-
½ teaspoon salt
-
1 teaspoon sesame oil (optional for aroma)
-
1 tablespoon sesame seeds (white or black)
-
Nori (seaweed sheets), cut into small strips for wrapping
Optional fillings:
-
Tuna mixed with mayonnaise
-
Cooked chicken bits
-
Shredded cheese
-
Fried egg pieces
-
Pickled vegetables or radish
-
Cooked salmon flakes

Step 1: Prepare the Rice
The secret to perfect rice balls lies in the rice itself. You need it sticky enough to hold its shape. Warm rice works best — not too hot, not cold.
Once your rice is ready, add a pinch of salt and a drizzle of sesame oil for a subtle nutty flavor. Mix gently with a wooden spoon.
Step 2: Shape with Care
Before shaping, wet your hands lightly with water. This keeps the rice from sticking to your fingers. Rub a little salt on your palms — this adds flavor and helps preserve the rice if you’re packing it for later.
Scoop a small amount of rice (about a quarter cup) and flatten it slightly in your hand.
Step 3: Add the Filling
Place your chosen filling in the center. Don’t add too much — just a small spoonful is perfect. Add another small layer of rice on top and press gently, shaping it into a ball, triangle, or oval.
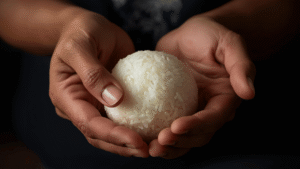
Keep rotating it in your hands until it feels firm but not squished.
Step 4: Finishing Touches
Once shaped, roll the rice ball in sesame seeds or wrap a small strip of seaweed around the middle. The nori not only adds flavor but also makes it easier to hold.
If you want to get creative, sprinkle a bit of chili flakes or drizzle soy sauce for an extra kick.
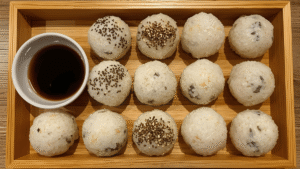
Serving Ideas
Rice balls are best enjoyed warm or at room temperature. Serve them with a bowl of miso soup or some sliced cucumbers for a refreshing side.
They’re perfect for:
-
Lunchboxes: They stay soft and flavorful even after hours.
-
Picnics: Easy to carry and no mess.
-
Parties: Make different fillings and serve as bite-sized treats.

Storage Tips
If you have leftovers, store them in an airtight container in the fridge. To reheat, wrap each rice ball in a damp paper towel and microwave for 20–30 seconds. It brings the softness right back.
Avoid leaving them out for too long, as cooked rice can dry up quickly.
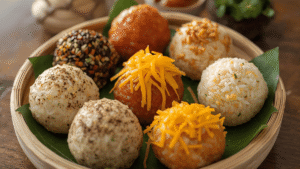
Recipe Variations You’ll Love
One of the best parts about this recipe is how easy it is to customize. Once you’ve mastered the base, try these fun variations:
-
Spicy Tuna Rice Balls: Mix tuna with a bit of sriracha.
-
Cheesy Melt: Add shredded mozzarella in the center for a gooey surprise.
-
Fried Rice Balls: Coat in breadcrumbs and fry until golden brown (great for party snacks).
-
Vegetarian Delight: Use sautéed mushrooms or tofu for a meat-free version.
-
Sweet Rice Balls: Mix sugar and coconut flakes for a dessert twist.
Expert Tips for Perfect Rice Balls
-
Always use short-grain rice — it’s naturally sticky and holds shape better.
-
Don’t press too hard — it should hold together but stay fluffy inside.
-
Use plastic wrap if you don’t want to touch rice directly.
-
You can pan-sear the rice balls lightly for a crispy surface.
-
Add furikake (Japanese rice seasoning) for color and flavor.
My Final Thoughts
Every time I make rice balls, I’m reminded of how beautiful simple food can be. A handful of rice, a pinch of salt, and a bit of creativity — that’s all it takes to make something comforting and full of love.
Whether you’re making them for your kids’ lunch, for yourself after a long day, or for a picnic with friends, these easy rice balls always bring smiles.
So go ahead, open that rice cooker, grab a bit of seaweed, and start shaping happiness in your hands — one rice ball at a time.

Ingredients
Method
- Prepare warm sticky rice and mix with salt and sesame oil.
- Wet your hands with water and shape rice into small mounds.
- Add your filling, cover with more rice, and form into a ball or triangle.
- Sprinkle sesame seeds or wrap with nori.
- Serve fresh or store in the fridge for later.
Related Posts

When the Mood Is “Celebrate Anyway”: Filled Mini Bundt Cakes
Some days don’t come with a reason to celebrate. No…

Cozy Homemade Candied Pecans Recipe for Comfort Snacking
Cozy & Grounded: Candied Pecans for When You Need Comfort…

When the Mood Calls for Something Sweet: High-Protein Strawberry Muffins
I didn’t plan this recipe. It started the way most…