
The Magic of the Sopaipilla
If you have ever visited a home in Chile or the American Southwest, you have likely encountered the sopaipilla. It is a simple, humble fried bread that feels like a warm hug. When done correctly, the outside is shatteringly crisp while the inside remains soft and pillowy. It is not overly complicated, but it does require a bit of patience and a gentle touch with the dough.
Understanding the Dough
The beauty of a sopaipilla lies in its simplicity. Most recipes rely on flour, a fat sourceu2014usually lard or vegetable shorteningu2014and a liquid to bring it together. In some regions, you will find recipes that incorporate cooked squash or pumpkin into the dough, which provides a lovely color and a subtle earthiness. If you are a beginner, I recommend starting with a standard flour-based dough before experimenting with squash additions.
Key Ingredients
- All-purpose flour: The backbone of the structure.
- Baking powder: Essential for that signature puff during frying.
- Fat: Lard gives the most authentic flavor, but butter or shortening works perfectly.
- Warm water or milk: To hydrate the gluten without making it tough.
- Salt: A pinch to balance the flavor.
The Process: From Bowl to Fryer
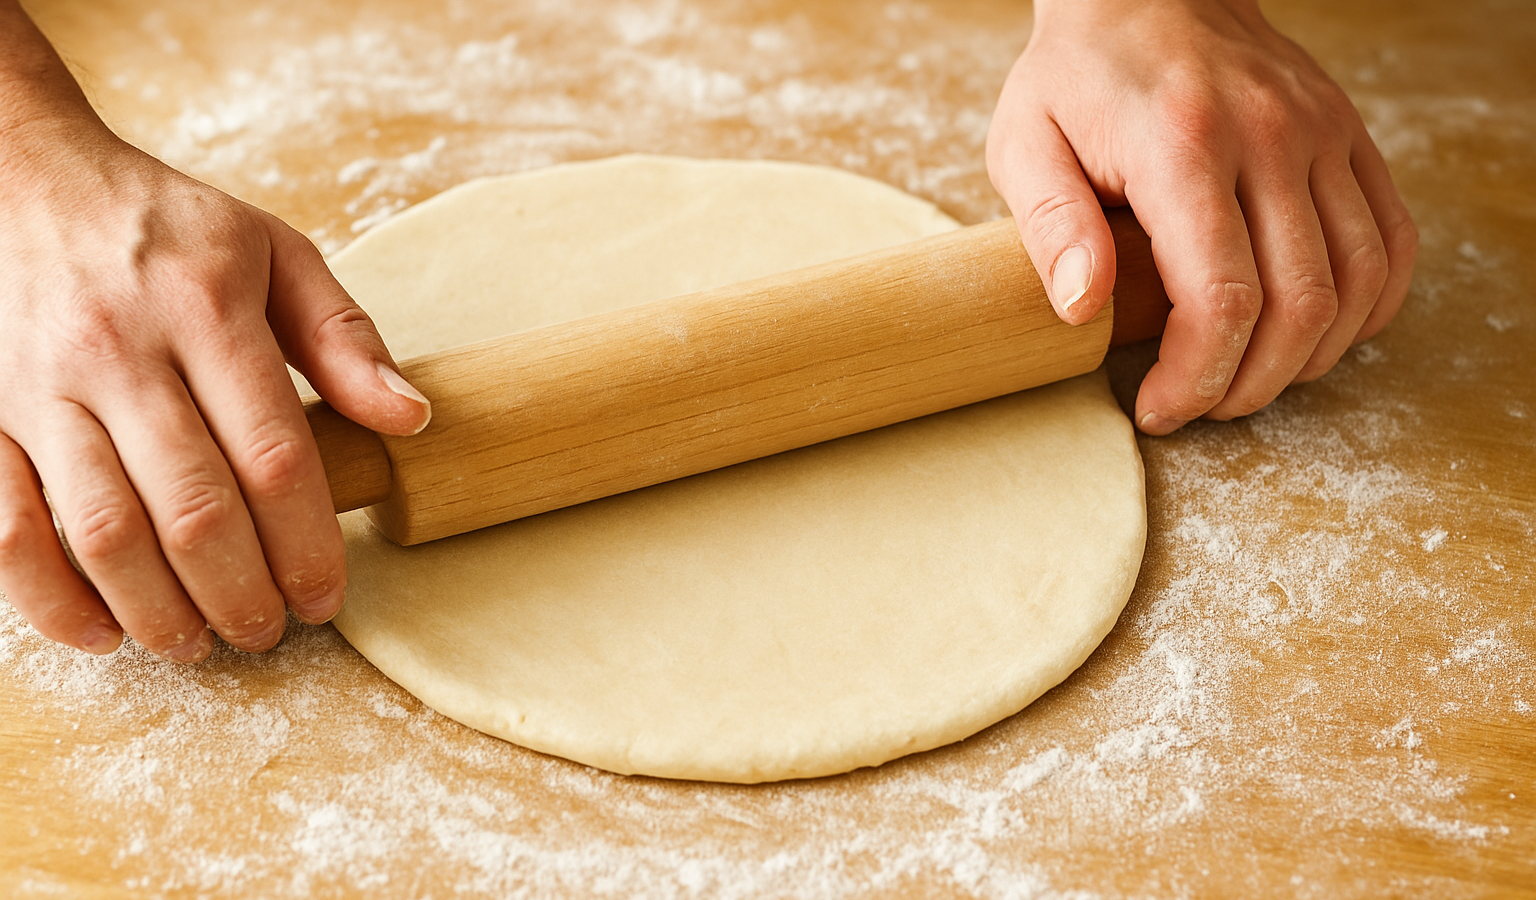
Start by mixing your dry ingredients. When you cut the fat into the flour, aim for a texture that resembles coarse crumbs. This is the secret to a tender crumb. Gradually add your liquid. You want a dough that is soft and smooth but not sticky. If it sticks to your fingers, add a tablespoon of flour at a time. The most important step here is resting the dough. Let it sit covered for at least 30 minutes. This allows the gluten to relax, making it much easier to roll out without the dough snapping back at you.
Rolling and Shaping
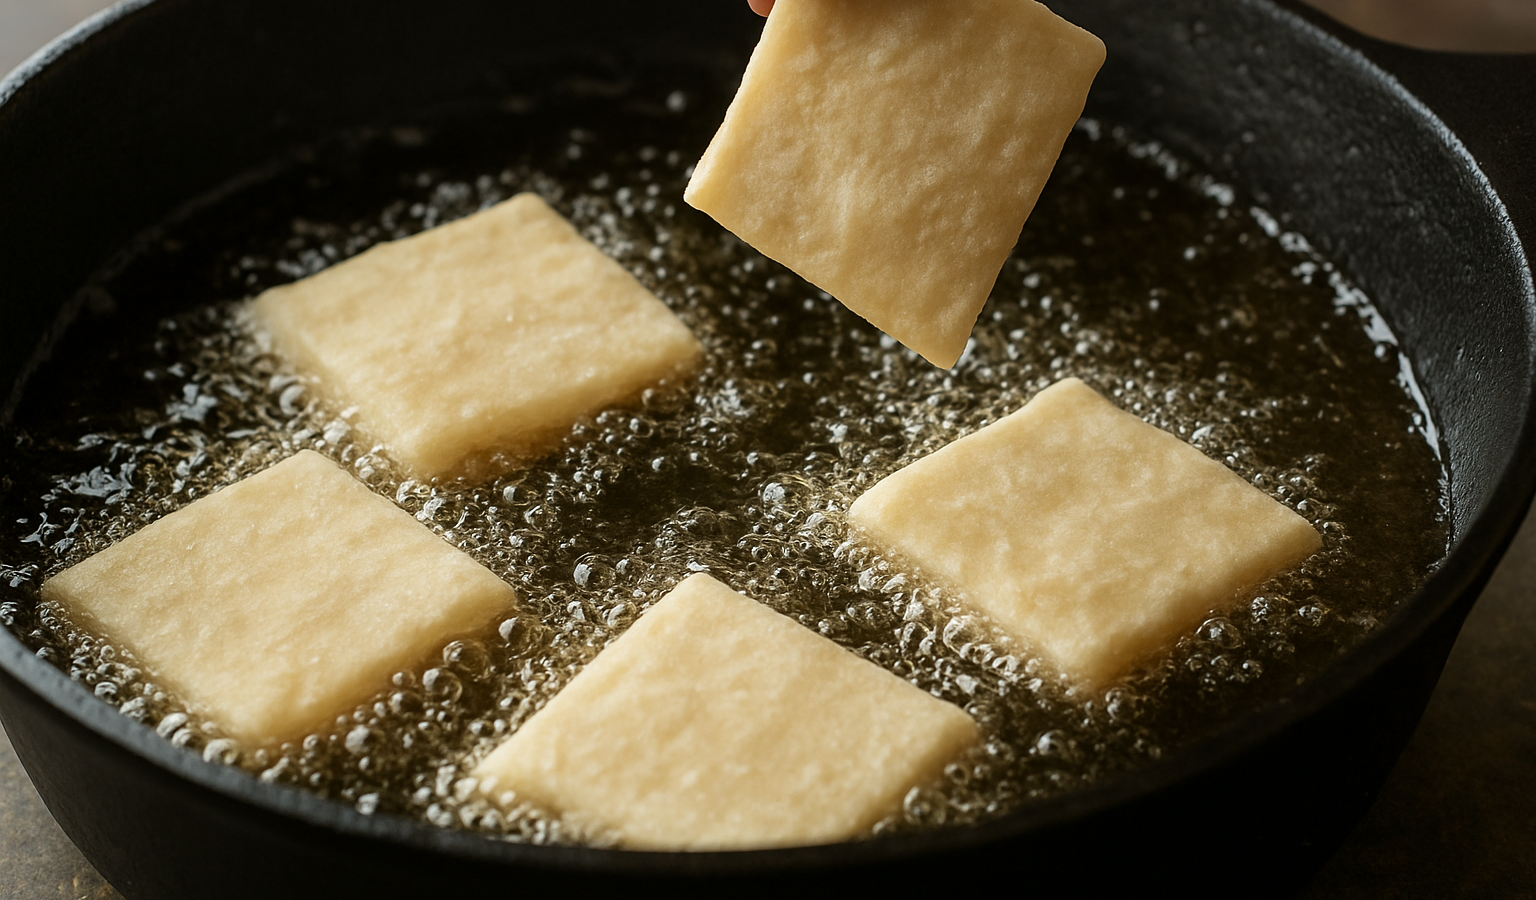
Roll your dough out to about a quarter-inch thickness. You can cut them into circles with a cookie cutter or simply use a knife to cut squares or triangles. I prefer squares because there is no wasted dough to re-roll. Before you drop them into the oil, poke each piece with a fork a few times. This prevents them from ballooning into large, uncontrollable spheres and ensures even cooking.
Frying for Perfection
Temperature is everything. You want your oil to be around 350u00b0F (175u00b0C). If the oil is too cool, the dough will soak up the grease and become heavy. If it is too hot, the outside will burn before the inside cooks through. Use a heavy-bottomed pot, like a Dutch oven, to maintain a steady temperature. Fry only a few at a time to avoid dropping the oil temperature too drastically.
Serving and Storage
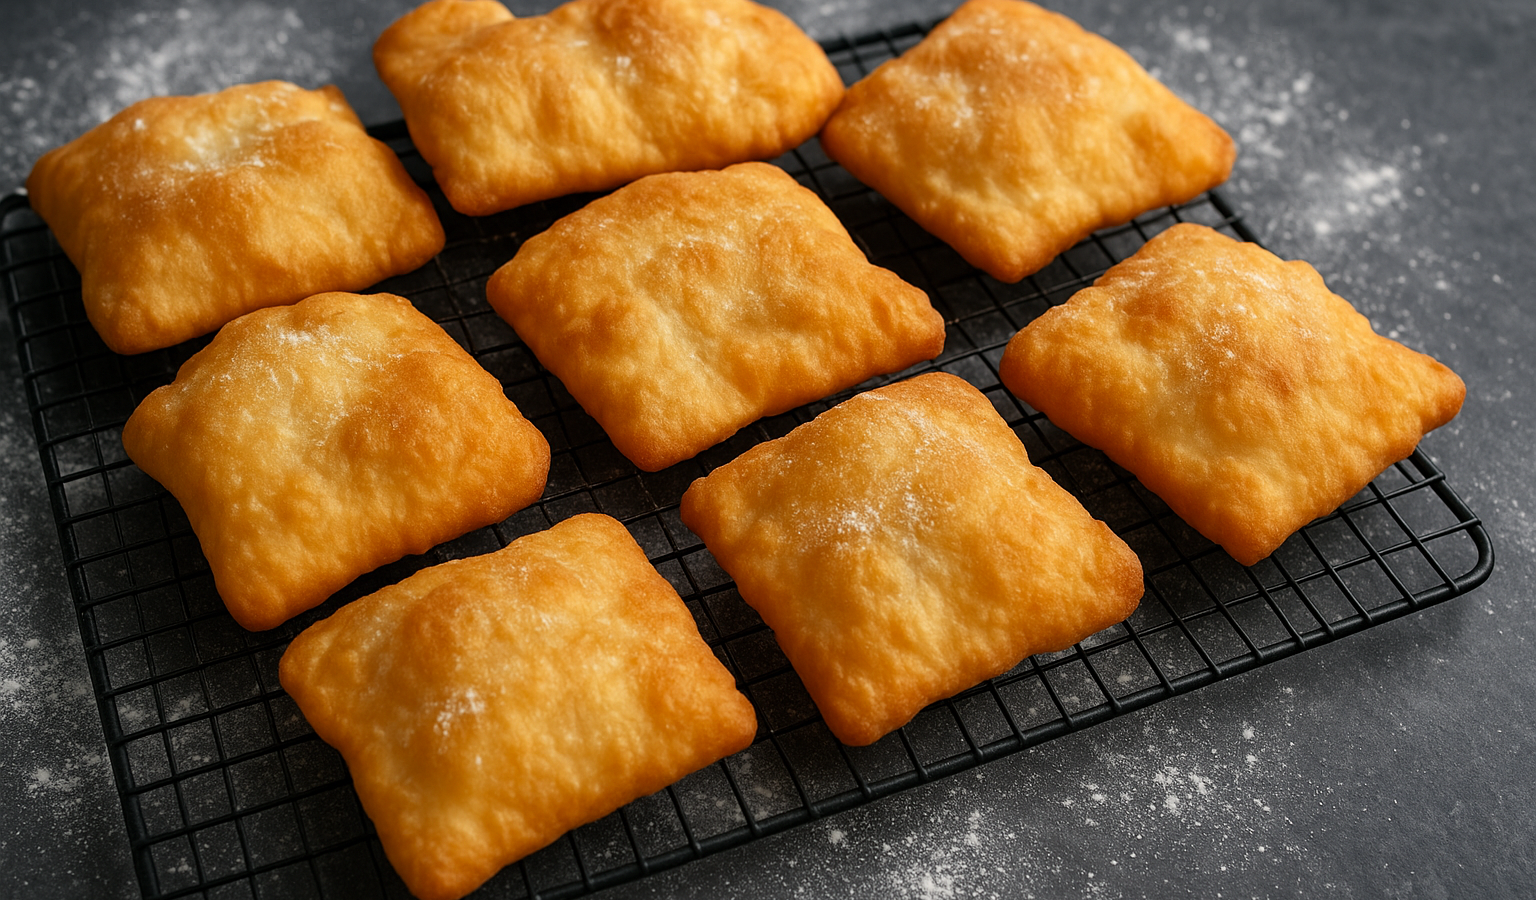
Sopaipillas are best eaten fresh, straight from the wire rack. In Chile, they are often served with pebre, a spicy tomato-onion salsa. In the American Southwest, they are frequently drizzled with honey or stuffed with beans and cheese. To store leftovers, keep them in an airtight container at room temperature for a day. To reheat, skip the microwave, which turns them rubbery. Instead, place them in a 350u00b0F oven for five minutes to crisp them back up.
Frequently Asked Questions
Why did my sopaipillas turn out tough?
Toughness usually comes from overworking the dough. Handle it gently once you add the liquid and always let it rest.
Can I bake them instead of frying?
You can bake them at 400u00b0F, but they will be more like a flat biscuit than the traditional fried bread. The frying process is essential for the texture.
Can I make the dough ahead of time?
Yes, you can keep the dough in the refrigerator for up to 24 hours. Bring it to room temperature before rolling it out.
Related Posts

Best Foods to Lift Your Mood Fast
There are days when motivation disappears quietly. Nothing dramatic happens,…
Easy Vegetarian Crockpot Recipes: A Cozy Story of Flavor, Simplicity & Self-Care
There’s something magical about coming home after a long, busy…

When Love is on the Menu: Cozy Lunch Ideas for Two
Okay, real talk for a second. Sometimes, the biggest craving…